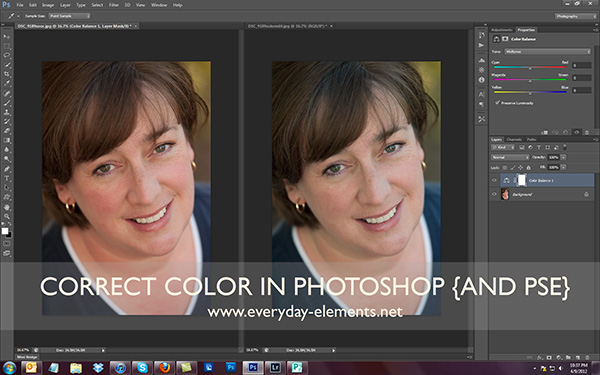
I thought it might be fun to take a photo and work on one thing at a time, and have the tutorials build on each other, all using the same photo. I am starting out this “series” in Photoshop CS6 beta, but the steps can be done in Photoshop Elements also (or an alternate step in PSE).
The image I am using is one I took over the weekend for my sister, Kirsite, who needed a new head shot. I told her I would do but asked one favor in returen- that I could use the pictures for tutorials – and she graciously consented. Thank you, Kirstie!!
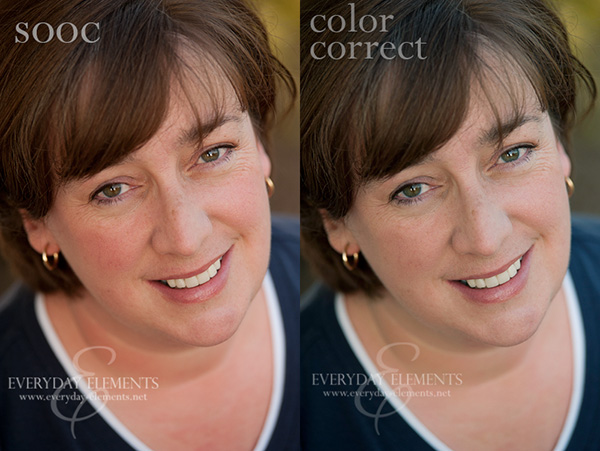
Okay, we are going to start out by analyzing the image. What is amiss with the photo? What could be made better? The first thing that jumps out at me is the color. The image is too warm (happens when you shoot in the evening sometimes), and she has areas of redness on her neck, chest and cheek.
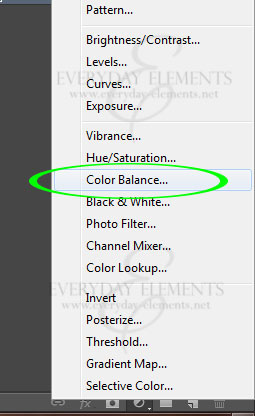
To tackle those issues, we will use ADJUSTMENT LAYERS. You can find your adjustment layers by clicking on the half black/half white circle at the bottom of the layers palette.
Once you click on the icon, a long menu will pop up. Choose Color Balance (in PSE, choose Levels and do a WB adjustment)
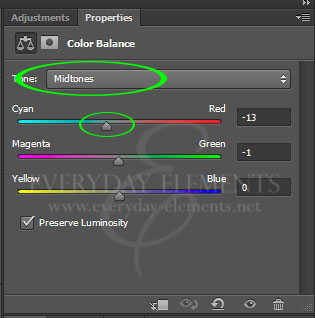
If the Tone isn’t already at Midtones, click on the menu and choose it. If you are editing a subject with much darker skin, like African American, then you may want to choose Shadows.
The image we are using has too much red in it (make sure you identify the problematic color – watch video tutorial for more explanation on that topic), so I pulled the slider on the Cyan/Red spectrum towards Cyan, which pulled out some of the red.
I really liked what this did for her skin, but didn’t like that it made her hair a bit green. So, I took a soft, black brush and used the mask to conceal some of the change on her hair.
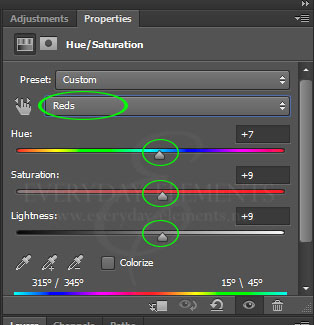
After getting the color where I liked it, I then tackled the redness on her neck, chest and cheek. I used a Hue/Saturation adjustment for this step, and after creating the adjustment, I went into the reds and tweaked the sliders to be what you see below.
I inverted the mask (control/command + i) and used a soft, white brush over the areas that were red. I used a stronger brush over the areas that were more red and a lighter opacity brush over areas that were less red.
Here is the result of the two layer adjustments (no other edits were done to this image, because we will be doing that in upcoming tutorials).
To see these adjustments in “real time” watch the video tutorial below. If you have PSE, I do show how to use Levels since PSE does not have Color Balance.

